Let’s face it, moving your website from one hosting company to another can be a daunting and stressful task.
But it doesn’t have to be!
With a little bit of planning and these simple steps, you can make the switch with ease.
We have been in the online marketing business since 2009, and in that time we’ve built hundreds of websites on a variety of web hosting providers.
We’ve also switched our own websites over to new web hosting providers dozens of times.
So, I can say with confidence that it’s not as difficult as it may seem.
Here’s our simple guide on how to change website hosts, step by step:
Table Of Contents
- Step 1: Choose a New Hosting Provider
- Step 2: Choose Between Using a Migration Service or Do It Manually
- Step 3: Backup Everything!
- Step 4: Create a New Database
- Step 5: Import Your Database
- Step 6: Edit Your Website’s Files (WordPress, Joomla, and Drupal Websites Only)
- Step 7: Upload Your Files to the New Server
- Step 8: Test Your Website
- Step 9: Update Your DNS
- Step 10: Move Your Email
- Step 10: Cancel Your Old Web Hosting Account
- FAQS
- Ready to Switch to a New Host?
Step 1: Choose a New Hosting Provider
The first step is choosing a new web hosting provider worth your money.
I can’t tell you how many people I know that change web hosting provides every few months.
This is ridiculous and not only a waste of time but it’s also a waste of money.
I understand that it’s really hard to know which web host is the best because you simply don’t have the resources to test them all out and see for yourself.
Luckily, we do.
We have tested and reviewed hundreds of web hosting providers and have compiled a list of the best ones.
Here are a few of our favorites
Step 2: Choose Between Using a Migration Service or Do It Manually
Migrating your website to a new host can be quite technical.
You have to transfer your files, change DNS settings, update databases, and more.
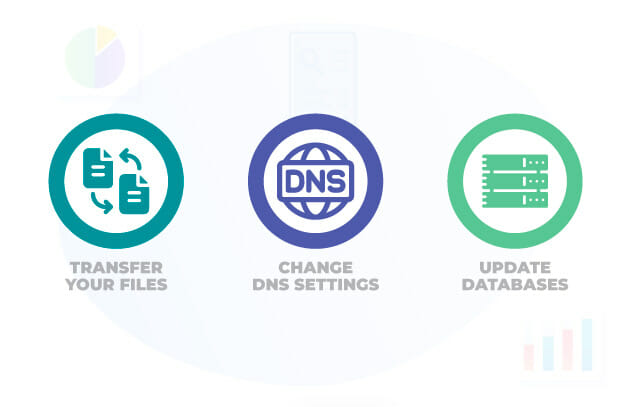
This can be overwhelming and even a little scary if you are not a technical person.
That’s why many web hosting providers offer free site migration for new customers.
Using a Migration Service
The process will be much easier if you decide to use a migration service.
You won’t have to worry about any of the technical details because your new provider will take care of it for you.
All you need to do is:
- Sign up with a hosting provider that offers free migration, such as SiteGround, Cloudways, InMotion Hosting, or GreenGeeks.
- Request a site migration and provide your previous hosting provider details to the support team.
- Sit back and relax while the migration team does all the work for you.
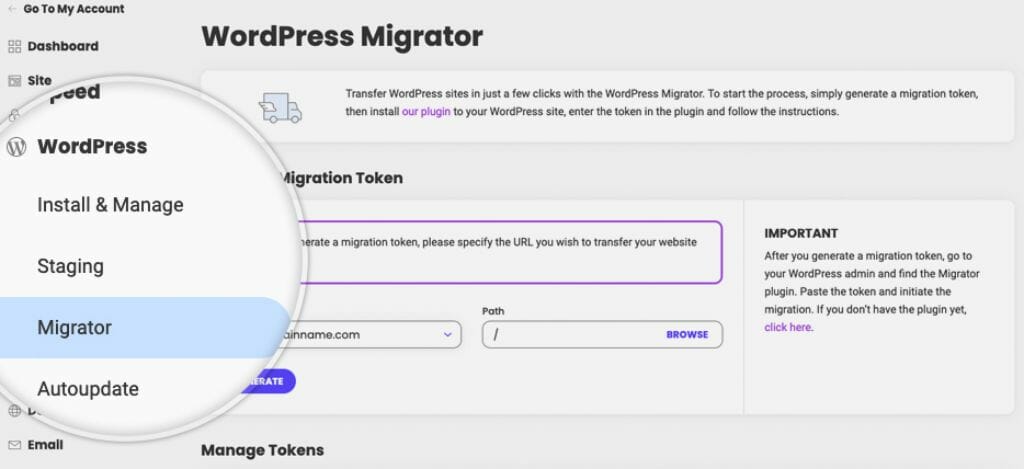
If you have a WordPress site, then you are in luck.
Some hosting companies, such as Cloudways and SiteGround have their own WordPress migration plugins that can automatically migrate your website to the new hosting account in a matter of minutes and for free.
You just need to download the plugin, install it on your WordPress site, and follow the instructions.
 The process is very simple and straightforward
- You don’t have to worry about any of the technical details
- It’s usually free of charge
 The process is very simple and straightforward
- It can take a few days for the migration to be completed
- You’re relying on someone else to do it for you, so you don’t have full control
- Not all web hosts offer this service for free
 It can take a few days for the migration to be completed
Migrating Your Website Manually
Although the process of migrating your website manually may seem daunting, it’s actually not that difficult.

Read on and you’ll find out each step you need to take to do it yourself without any problems.
- It’s a very useful skill to have if you intend to manage your own website
- You learn a lot of technical details about how your website, which will help you troubleshoot any problems in the future
- It’s usually faster than using a migration service since you’re in control of the process
- It’s a more technical process, which can be overwhelming for some people
- You have to be very careful so that you don’t break anything
- If you make a mistake, it could cause your website to go offline
Step 3: Backup Everything!
I won’t be exaggerating if I say this is the most important step in the whole process.

During the migration, there is always a small chance that something could go wrong.
It’s very rare, but it does happen.
That’s why it’s crucial that you have a recent backup of your website before you start.
Most hosting providers offer some kind of backup service, but it’s always a good idea to have your own backup as well.

That way, you’re sure that you won’t lose any data if something does go wrong.
There are two things you need to backup:
- Your site files: These are the files that make up your websites, such as your HTML, CSS, and image files.
- Your database: This is where all your website’s content is stored, such as your posts, pages, and comments.
Method 1: Backup Your Website Using cPanel
- Log in to your cPanel
- Search for Backup
- Scroll down to Full Backup, and click Download a Full Website Backup
- Under Backup Destination, select Home Directory
- Click Generate Backup
- Wait till the backup is generated, then scroll up to the Backups Available for Download section and click on the most recent backup file to download it.
- Go to the Databases section and click on phpMyAdmin
- Select your site’s database, then click Export
- On the next page, click Go to start the download
- That’s it! Now you have your website files and database safely backed up.

Method 2: Backup Your WordPress Website Using a Plugin
- Log in to your WordPress dashboard
- Go to Plugins > Add New
- In the search field, type in All in One WP Migration
- Install and activate the Plugin
- Once the plugin is activated, go to All in One WP Migration and select Export To
- Choose File from the dropdown menu
- Wait for a few seconds till the export is complete, then click DOWNLOAD YourDomainName
- Your website is now backed up. You can save the file on your computer or any other storage you like

Note: If you have WordPress sites, then skip right to Step 7.3.
You don’t need to create new databases, edit files, or any of that.
You need to download your website with All in One WP Migration, then upload it to the new WordPress site provided by your host using the same plugin.
That’s all there is to it! You can have your website migrated to a new host in just a few minutes.
Step 4: Create a New Database
Now that you have successfully backed up your website, it’s time to create a new database on the new web host server.
This is where your website’s content will be stored.
Again, we’ll be using cPanel for this.
- Log in to your new hosting’s cPanel
- Scroll down to the Databases section and navigate to the MySQL Databases section
- Click on Create New Database
- Fill in the database name and click Create Database
- You will be asked to create a username and password for the database. Make sure to use a strong password!

Step 5: Import Your Database
Now that we have a new database set up, it’s time to import your old website’s database into it.
- Navigate to the Database section
- Click on phpMyAdmin
- Select the new database that you just created
- Go to the Import section
- Click Choose File and select the database backup file that you downloaded earlier
- Click Go to start the import process

Step 6: Edit Your Website’s Files (WordPress, Joomla, and Drupal Websites Only)
If you have a dynamic website (most likely built with WordPress, Joomla, or Drupal) and download your website’s files via your cPanel, then you’ll need to edit your website’s files.
You see, when you downloaded your website’s files, they were still pointing to the database of the old server.
And we simply need to change that, so it points to the new database we just created.
Don’t worry it’s straightforward, and we only need to edit one file.
For this guide, we will assume that:
- New Database Name: NewDB
- User Name: User
- Password: User123
 New Database Name: NewDB
Edit Your WordPress Site’s Files
If you have a WordPress website, the file you need to edit is the wp-config.php file.

Here’s how to edit it:
- Make a copy of the wp-config.php file
- Open the file in a text editor such as Notepad
- Press CTRL+F and search for MySQL database hostname, then replace the old hostname with your new database name. In this case, it will be NewDB
- Repeat the same process for MySQL database username and MySQL database password. In this case, we will change them to User and User123 respectively
- Save the file
Edit Your Joomla Site’s Files
If you have a Joomla website, the file you need to edit is configuration.php.

Here’s how to edit it:
- Make a copy of the configuration.php file
- Open the file in a text editor such as Notepad
- Press CTRL+F and search for public $db, then replace the old hostname with your new database name. In this case, it will be NewDB
- Repeat the same process for public $user and public $password. In this case, we will change them to User and User123 respectively
- Save the file
Edit Your Drupal Site’s Files
If you have a Joomla website, the file you need to edit is settings.php.

Here’s how to edit it:
- Make a copy of the settings.php file
- Open the file in a text editor such as Notepad
- Press CTRL+F and search for database, then replace the old hostname with your new database name. In this case, it will be NewDB
- Repeat the same process for username and password. In this case, we will change them to User and User123 respectively
- Save the file
Step 7: Upload Your Files to the New Server
Now that we’ve edited our website’s files, it’s time to upload them to the new web host server.
Method 1: Upload Your Files Using cPanel
- Log in to your new hosting’s cPanel
- Navigate to the Files section and click on File Manager
- Locate and click on public_html
- Click on Upload
- Click on Select File, select the website’s files that you downloaded earlier, then click Open

Method 2: Upload Your Files Using Filezilla
- Log in to your new web hosting account
- Go to Files > FTP accounts
- Create a new user
- Download the FileZilla Client
- Open FileZilla and fill in the hostname, username, password, and port fields with the information from your FTP client
- Click Quickconnect
- Locate public_html and drag & drop or upload your website’s files into it
- That’s it! You’ve successfully moved your website to a new web host.

Method 3: Use WordPress Plugin
Remember the All in One WP Migration Plugin that we talked about earlier?
We can use it to upload both our files and database to the new web hosting server.
To do that, simply follow these steps:
- Install and activate the plugin on your new WordPress site (provided by the hosting service)
- Navigate to the Import tab
- Click Import From
- Select File from the dropdown menu
- Upload the export file that you downloaded from your old site
- Click Open
- And that’s it! You’ve successfully moved your WordPress site to a new web host

Step 8: Test Your Website
Now that you’ve moved your files to a new web host, it’s time to test it out.
This is your chance to ensure everything works as it should before you switch.
Here’s a checklist of things you should test:
- Website speed
- Images and other media files
- Styling and design
- Forms and contact pages
- Broken links
- Mobile responsiveness
- 404 pages
Take your time to test everything and ensure that your website works perfectly.
If you find any issues, don’t hesitate to contact your new web hosting provider’s customer support.

To be honest with you, most of the time, the support will send you an article and tell you to troubleshoot the problem yourself, which isn’t very helpful.
For this reason, we put together a list of the most common errors you might encounter when moving to a new host and how to fix them.
1. Page Not Found Problem
The best way to find pages that aren’t working properly is by keeping an eye on your 404 log.

You can view your 404 log by going to your Google Search Console > Diagnostics > Crawl Errors > Not Found.
Once you identify the pages that are returning a 404 error, you have 1 of 2 options:
- Show your visitors a custom 404 page
- Redirect the page to a working page
If you decide to show your visitors a custom 404 page, add the following code to your .htaccess file:
ErrorDocument 404 /newpage.html
Make sure to change newpage.html with the page you wish to show your visitors when there is an error.
If you want to redirect the page to a working page, add the following code to your .htaccess file:
Redirect 301 /previouspage.html http://yourwebsite.com/newpage.html
2. Redirecting Dynamic Pages
If you changed your site structure at the new host, you can redirect your dynamic page using this code.
RewriteEngine on

RewriteCond %{QUERY_STRING} ^id=13$

RewriteRule ^/page.php$ http://yourwebsite.com/newname.htm? [L,R=301]
3. Directory Not Found Problem
Similar to redirecting a page, you can redirect an entire directory using the Redirect directive.

Just add the following code to your .htaccess file:
RedirectMatch 301 ^/category/?$ yourwebsite.com/newcategory/
4. Database Errors
Sometimes during website migration, your database can get corrupt.

This can be caused by several things, such as:
- Error establishing a database connection
- Interrupted connection during the migration process
The most common one is the Error establishing a database connection error.
If you encounter this error, you should first check your wp-config.php file to see if your database credentials (host, username, and password) are correct.
If they are, then the next step is to re-upload your database.
Follow the steps we discussed in the earlier section on how to do that using phpMyAdmin.
If you’re still having issues, then try one of the following methods:
Method 1: phpMyAdmin
- Go to phpMyAdmin
- Locate and open your website database
- Check the Check All / Check tables having overhead button
- Choose Reapair table from the dropdown menu
Method 2: WordPress Auto-Repair
- Go to your wp-config.php file
- Press CTRL + F and search for /** Absolute path to the WordPress directory. */
- Above this line, add this: define(‘WP_ALLOW_REPAIR’,true);
- Save changes
- Go to http://yourwebsite.com/wp-admin/maint/repair.php
- Click Repair and Optimize Database
- After it’s done, go to your wp-config.php file and remove the define(‘WP_ALLOW_REPAIR’,true); line you added earlier, then save changes
Step 9: Update Your DNS
Computers don’t understand words as we do.

Instead, they use DNS (Domain Name System) records to translate human-readable domain names (like yourwebsite.com) into IP addresses (like 192.168.0.24).
Think of the DNS server as the internet’s phonebook.
Right now, your domain name will be pointing to your old host, so we need to change that.
The process is relatively simple, but it’s different from one domain registrar to another.
But here is a general idea:
- Log into your domain registrar’s hosting account
- Navigate to the DNS Management page
- Find the A record for your domain name and replace the IP address with the new host’s IP address
- Save your changes
Depending on your registrar, it can take up to 48 hours for these changes to take effect. But in most cases, the changes propagate within a few minutes.
Step 10: Move Your Email
If you have email accounts associated with your domain name, you’ll need to point them to the new server as well.

The process is very similar to updating your DNS records:
- Log into your domain registrar’s hosting account
- Navigate to the DNS Management page
- Find the MX record or @ record for your domain name and update the IP address to the new one provided by your web hosting provider
- Save your changes
Step 10: Cancel Your Old Web Hosting Account
Congratulations!
You’ve successfully moved your website to a new host.
But there’s one more thing you need to do: cancel your old web hosting account.

You don’t want to keep paying for two web hosting accounts, do you?
To cancel your old hosting account, log into it and navigate to the payment or billing section.
Most web hosts make it easy to cancel your hosting account.
But if you can’t figure it out, contact their customer support and ask them to help you.
FAQS
What Is Website Migration?
Website migration is the act of moving your website from one hosting provider to another.
How Much Does It Cost to Migrate a Website to a New Web Host?
It costs $0 to migrate a website to a new host. You only need to pay for the new hosting environment.

Can I Transfer My Website From Godaddy?
You can transfer your website from GoDaddy to any other hosting provider you like.
Can I Transfer My Domain Name to a New Host?
You can transfer your domain name to a new host, but it’s not necessary.
You can keep your domain name registered with your current registrar and just update the DNS records to point to the new hosting account.

Does Switching Website Host Affect SEO?
Switching web hosts will not affect your SEO. However, if the migration is not done properly, your website might experience some downtime, which can have a temporary negative impact on your SEO.
Plus, if the new host is not as good as the old one, your website might load slower, which can also affect your SEO.
How Do I Change Ownership of My Website?
You can change ownership of your website by:
- Providing the hosting and domain registrar accounts to the new owner
- Transferring the Domain Name to the new owner. This is often done by replacing the email associated with the domain
- Sending over your website’s files and databases
Ready to Switch to a New Host?
Moving your website to a new host doesn’t have to be complicated or expensive.
By following the steps in this guide, you can easily switch web hosts without any downtime or loss of data.
If you are looking for a new web hosting provider, check out our list of the best web hosting for beginners.
We spent many hours testing and reviewing different hosting providers to find the best ones for different budgets and needs.